

You clean your floors every day. You wipe down your kitchen platform. You keep the bathroom scrubbed. But the walls? They quietly collect dust, hand marks, cooking splatter, and moisture stains until one day you look up and realise the room does not feel as fresh as it used to — even when everything else is clean.
Walls are the largest surface in any room, and they affect how the entire space looks and feels more than most people realise. A room with clean, fresh walls feels bigger, brighter, and genuinely well maintained. A room with dusty, marked walls feels dull no matter how clean the floor is.
The good news is that knowing how to clean walls of the house properly does not require professional equipment, expensive products, or hours of effort. It requires the right sequence, the right tools, and an understanding of what your wall surface can and cannot handle. This guide covers all of it — from dry dusting technique to stain removal, room-specific advice, and how to handle wall fungus the right way.
Why Walls Get Dirty Faster Than You Notice
Walls do not look dirty overnight, which is exactly why wall cleaning gets skipped until the problem becomes obvious. Understanding how dirt accumulates on walls helps you build a simple maintenance habit that prevents heavy buildup from developing in the first place.
Dust settles on vertical wall surfaces continuously, particularly on textured or matte paint finishes that have a slightly rough surface for particles to cling to. In Indian homes, the combination of outdoor dust, cooking fumes, and incense smoke means walls accumulate a visible dusty film within weeks, especially in living rooms and near the kitchen.
Hand marks and finger smudges appear wherever people touch walls regularly — near light switches, around door frames, along hallways, and at children’s height across every room. These oil-based marks do not wipe away with dry cleaning and need a mild solution to lift properly.
Kitchen walls face the toughest conditions. Cooking oil vapour, steam, and masala splatter settle on the wall surface near the stove and gradually build up into a sticky, yellowed film that is much harder to remove the longer it is left.
Moisture damage and fungal patches appear on walls in bathrooms, kitchens, and rooms with poor ventilation, particularly during and after the monsoon season. These require a specific approach that is different from regular wall cleaning, which we cover in detail further in this guide.
Know Your Wall Paint Type Before You Start Cleaning
This is the step that most wall cleaning guides skip and the one that causes the most damage during DIY wall cleaning. Different paint finishes react very differently to water, cleaning solutions, and scrubbing pressure. Cleaning a matte painted wall the same way you would clean a semi-gloss wall can cause the paint to fade, streak, or peel.
Matte and flat finish paint is the most delicate. It has no sheen and absorbs liquid quickly, which means excess water can leave water marks, cause the paint to lift slightly, or produce uneven patches. For matte walls, dry dusting is your primary cleaning method. When liquid cleaning is necessary for a stain, use a barely damp cloth with very mild soap solution and the lightest possible pressure. Never scrub a matte painted wall.
Satin and eggshell finish paint has a soft, low sheen and is significantly more washable than matte. These finishes are common in bedrooms and living rooms in Indian homes because they balance aesthetics with practicality. A damp cloth with mild soap solution applied in gentle, circular motions is safe on satin walls. Avoid abrasive pads or strong chemical cleaners.
Semi-gloss and gloss finish paint has a visible shine and is the most durable and washable of all wall finishes. These are standard in kitchens, bathrooms, and children’s rooms because they can handle regular wiping and light scrubbing without damage. Most cleaning methods are safe on gloss walls, including slightly stronger cleaning solutions for grease and stain removal.
When in doubt about your paint type, test any cleaning method on a small, hidden area of the wall first and check after drying before proceeding across the full surface.
The Easy Way to Clean Walls of the House Step by Step
Follow this sequence and wall cleaning becomes a straightforward, manageable task rather than a daunting one.
Step 1 — Dry Dust the Walls Before Any Liquid Touches Them
Dry dusting before wet cleaning is the single most important rule of wall cleaning, and it is the step most people skip because it feels like extra work. It is not extra work. It is what prevents the actual work from being twice as hard.
When you apply a damp cloth or cleaning solution to a dusty wall surface, the water mixes with the dust and creates a grimy, streaky film that smears across the wall rather than cleaning it. This is why many people find their walls look worse after a quick wipe than they did before. The solution is always to remove dry dust first.
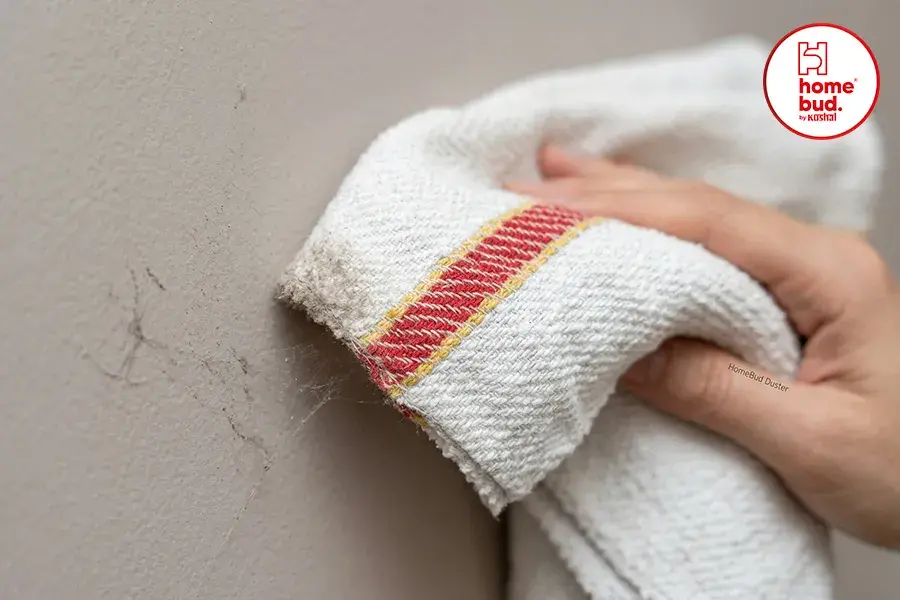
Use the Homebud floor duster or a soft cloth duster to dust the wall surface from top to bottom in long, sweeping strokes. Always work from the ceiling downward so that any dust that falls lands on uncleaned sections below rather than on areas you have already cleaned. Pay particular attention to the upper corners where cobwebs and dust accumulate most and are most easily missed, the area around light switches and plug points, and the wall section directly above skirting tiles or floor level where dust and debris collect.
Once the dry dusting is complete, the wall surface is ready for wet cleaning without the risk of smearing.
Step 2 — Prepare a Mild Cleaning Solution and Apply Correctly
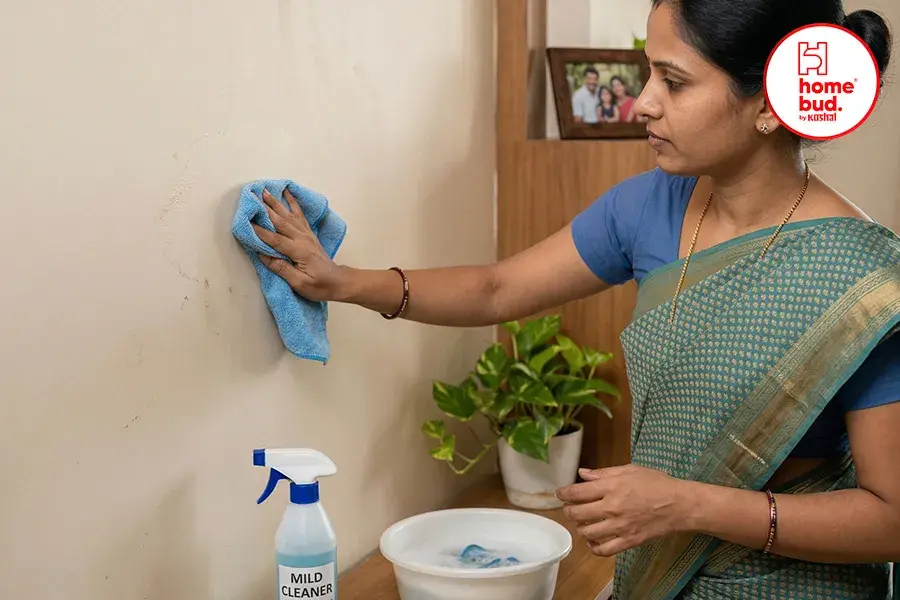
For most wall surfaces, a mild cleaning solution of warm water and a small amount of liquid soap or a gentle all-purpose cleaner is all you need. The ratio should be approximately one teaspoon of liquid soap to one litre of warm water. This is gentle enough for satin and eggshell finishes and effective enough to lift hand marks, light staining, and general grime from most painted surfaces.
Dip a soft cloth into the solution and wring it out thoroughly before it touches the wall. The cloth should be damp, not wet. A wet cloth on a wall introduces excess moisture that can seep behind the paint layer, cause water marks as it dries, and on matte finishes can lift or soften the paint itself. A damp cloth applies just enough moisture to loosen and lift surface dirt without saturating the wall.
Work in small sections of approximately 60 to 90 cm at a time rather than attempting to clean the entire wall in one pass. Clean each section, wipe it with a clean, dry cloth to remove moisture, and then move to the adjacent section. This prevents any single area from staying wet for too long and gives you clear visibility of whether each section is coming clean before you move on.
How to Clean Walls in Different Rooms of the House
Each room in your home has different wall cleaning needs based on the type of dirt it accumulates, the paint finish typically used, and how frequently cleaning is required. Here is the room-specific guidance that makes wall cleaning genuinely effective.
Living room walls accumulate dust and the occasional hand mark but are generally the easiest walls to maintain. Dry dusting every two to three weeks prevents significant buildup from developing. A damp cloth wipe with mild solution every one to two months keeps the walls looking fresh. Focus on the area around light switches, the wall space nearest to sofas and chairs where contact is frequent, and the upper corners where dust settles.
Bedroom walls are similar to living room walls in terms of cleaning needs. The wall area directly behind the bed head tends to accumulate hair product residue and body oil from contact, and should be included in regular wipe-downs. If your bedroom has an attached bathroom, check the shared wall regularly for early signs of moisture or fungal patches developing from bathroom humidity.
Kitchen walls require the most frequent and thorough cleaning of all rooms. Cooking oil vapour and masala steam settle on kitchen walls constantly, and this residue becomes increasingly sticky and difficult to remove the longer it builds up. Kitchen walls near the stove area should be wiped down every one to two weeks. Use warm water with a slightly stronger degreasing solution for kitchen walls — a mixture of warm water, a few drops of dish soap, and a small amount of white vinegar cuts through cooking oil residue effectively on semi-gloss or gloss finish kitchen walls. Never use this stronger solution on matte painted walls.
Bathroom walls deal with steam, soap splatter, and constant moisture. They require regular wiping to prevent the soap film and moisture from creating the conditions where mold and fungal patches develop. After every shower, try to open the bathroom door or window to allow steam to escape rather than settling on wall surfaces. Wipe bathroom walls with a dry cloth every few days to keep moisture from sitting on the surface for extended periods.
How to Remove Specific Stains from Walls
Different stains on walls need different treatments. Using the wrong approach on the wrong stain type can spread the stain or damage the paint finish. Here is how to handle the most common wall stains found in Indian homes.
Hand marks and finger smudges respond well to a damp cloth with mild soap solution applied in gentle circular motions. The oil in finger marks lifts with soap without needing any abrasive pressure. For persistent marks near light switches, a soft eraser applied very gently before the damp cloth wipe can lift the mark without disturbing the paint.
Cooking oil and grease splatter on kitchen walls needs a slightly warm, damp cloth with a degreasing solution. Apply the damp cloth and allow it to sit on the grease mark for thirty seconds before wiping, giving the solution time to break down the oil. Repeat if necessary rather than scrubbing hard, which risks removing paint along with the grease.
Crayon and pencil marks from children are common on walls at lower heights. A small amount of toothpaste or baking soda paste applied with a soft cloth and wiped in light circular motions removes most crayon marks from semi-gloss and gloss paint without damage. On matte painted walls, try an eraser first and proceed with extreme caution with any liquid method.
Water marks and moisture stains appear as yellowish or brownish rings on walls below leaky areas or around windows. Before cleaning the stain, always ensure the source of the moisture has been fixed. Cleaning a water mark without fixing the leak will result in the stain returning within days. Once the leak is fixed, a mild bleach solution diluted in water applied carefully to the stain with a cloth can help lighten water marks on lighter-coloured walls.
How to Clean Fungus from Walls the Right Way
Wall fungus — visible as black, green, or white patches with a musty smell — is one of the most common and most mishandled wall problems in Indian homes, particularly during and after the monsoon season. It is also one of the most important to address quickly because fungal spores affect indoor air quality and can cause respiratory irritation, especially for children and elderly family members.
The first and most important rule is to fix the moisture source before cleaning the fungus. Fungus on walls is always caused by persistent moisture — from a leaking pipe, seepage through an external wall, inadequate ventilation, or condensation. If you clean the fungus without addressing the moisture source, it will return within days or weeks.
Once the moisture source is fixed, prepare a cleaning solution of equal parts white vinegar and water or a diluted bleach solution of one part bleach to three parts water for more severe patches. White vinegar is the safer option for occupied homes and is effective on most early to moderate fungal growth. Bleach is more powerful but should only be used on light-coloured walls as it can cause discolouration on darker paint colours.
Apply the solution to the affected area using a cloth. Do not spray it on the wall as this can disperse fungal spores into the air. Work from the edges of the fungal patch inward to prevent spreading the spores outward across the surrounding clean wall area. Allow the solution to sit on the affected area for ten to fifteen minutes before wiping clean with a fresh cloth.
Ventilate the room thoroughly during and after cleaning by opening all windows and doors. Wear a mask while cleaning fungal patches to avoid inhaling spores. After cleaning and allowing the wall to dry completely, check the area again after twenty four hours. If the fungal patch has been thoroughly cleaned, the wall surface should look clean and dry. If patches remain, repeat the treatment.
For long-term prevention, improving ventilation in affected rooms, using a dehumidifier in high-humidity spaces during monsoon season, and keeping bathroom and kitchen walls dry by wiping them regularly are the most effective measures.
Common Mistakes That Make Wall Cleaning Harder
Even with the right intentions, these common mistakes cause more damage than the original dirt did. Avoid them and your walls will stay cleaner for longer with less effort.
Using too much water is the most frequent mistake. Walls are not floors. They cannot handle large amounts of moisture and too much water on any painted wall surface risks leaving water marks, causing paint to bubble, or introducing moisture that encourages mold behind the wall. Always use a damp cloth, never a wet one.
Scrubbing too hard is the second most common mistake. Aggressive scrubbing removes paint along with the dirt, leaving a visible lighter patch that looks worse than the original stain. Use gentle pressure and allow the cleaning solution to do the work rather than relying on force.
Skipping dry dusting and going straight to a damp cloth smears dust across the wall in a streaky film. Always dry dust first, every single time.
Cleaning with circular motions across large areas rather than in small sections makes it harder to see where you have already cleaned and where you have not, and often results in areas being missed or the same section being cleaned multiple times while adjacent areas are left dirty.
Using strong chemical cleaners on paint finishes that cannot handle them — particularly matte and flat finishes — causes more damage than the original stain. Always match your cleaning solution strength to your paint type.
Homebud Tools That Make Wall Cleaning Simpler
The right tool removes the frustration from wall cleaning and makes the job genuinely faster and more effective.
The Homebud floor duster is an excellent dry dusting tool for walls because its lightweight design and long handle let you reach upper wall areas and ceiling corners comfortably without a ladder. It lifts dust gently without grinding it into the wall surface, which is exactly what you need for the dry cleaning step that sets up every successful wall clean.
The Homebud Wroom Wiper Broom is a versatile combination tool that handles both sweeping and wiping in a single tool, making it useful for the floor cleaning that inevitably accompanies a proper wall cleaning session. After wall cleaning, dust settles on the floor below and needs to be swept and wiped before the room is fully clean.
Explore the full Homebud range of cleaning tools at homebud.in/product-category/broom/ to find everything you need for your complete home cleaning routine.
How Often Should You Clean Walls in Your Home
A simple frequency guide from a professional cleaner’s perspective.
Dry dusting should be done every two to four weeks across all rooms. This prevents the gradual dust buildup that makes walls look dull and reduces the frequency of wet cleaning sessions needed.
Wet cleaning with a damp cloth and mild solution should be done every one to two months for living rooms and bedrooms, every two to four weeks for kitchens, and every two to three weeks for bathrooms.
Deep stain treatment should be done as needed when specific stains appear, addressing them promptly rather than allowing them to set into the paint surface over time.
Fungus treatment should be done immediately upon noticing any fungal patches, before the growth spreads to a larger area of the wall.
FAQ — How to Clean Walls of the House
What is the safest way to clean painted walls without damaging the paint?
Always start with dry dusting using a soft cloth duster or broom to remove loose dust before any liquid is applied. For wet cleaning, use a damp cloth — not a wet one — with a mild soap and warm water solution. Work in small sections, wipe each section dry after cleaning, and avoid harsh scrubbing. Always identify your paint type first as matte finishes need significantly gentler treatment than satin or gloss finishes.
How do I clean walls in the house without leaving streaks?
Streaks are almost always caused by either too much water on the cloth or by cleaning a dusty wall without dry dusting first. Wring out your cloth thoroughly before it touches the wall, work in small sections, and use a separate dry cloth to wipe each section after cleaning. Working from top to bottom in vertical strokes rather than sweeping horizontal strokes also reduces streaking.
How do I clean kitchen walls with oil and grease buildup?
Use warm water with a few drops of dish soap and a small amount of white vinegar for kitchen walls with oil residue. Apply with a damp cloth and allow it to sit on the grease mark for thirty seconds before wiping. Repeat if needed. Kitchen walls near the stove area should be cleaned every one to two weeks to prevent the oil film from becoming a baked-on layer that is significantly harder to remove.
How to clean fungus from walls at home safely?
Fix the moisture source first — fungus always returns if the underlying moisture problem is not resolved. Then apply a solution of equal parts white vinegar and water to the affected area with a cloth. Allow it to sit for ten to fifteen minutes before wiping clean. Ventilate the room thoroughly and wear a mask during cleaning. For severe or recurring fungal growth, consult a professional.
Can I use the same cleaning method on all walls in my house?
No. Different paint finishes require different approaches. Matte and flat finishes are the most delicate and should only be dry dusted or cleaned with a barely damp cloth using the lightest possible pressure. Satin and eggshell finishes can handle a damp cloth with mild soap solution. Gloss and semi-gloss finishes are the most durable and can handle stronger cleaning solutions and light scrubbing when needed.
How often should I clean the walls of my house?
Dry dust every two to four weeks. Wet clean living room and bedroom walls every one to two months. Clean kitchen walls every two to four weeks and bathroom walls every two to three weeks. Treat stains as soon as they appear rather than leaving them to set, and address any fungal patches immediately upon noticing them.
Clean walls change how your entire home feels. The light sits differently in a room with fresh walls. The space feels bigger, calmer, and more welcoming. And once you build the right routine using the right sequence and the right tools, wall cleaning stops feeling like a big job and becomes a simple part of how you keep your home genuinely clean.
Ready to make your full home cleaning routine easier? Explore the complete Homebud range of cleaning tools at homebud.in/product-category/broom/ and find the right tools for every surface in your home.