

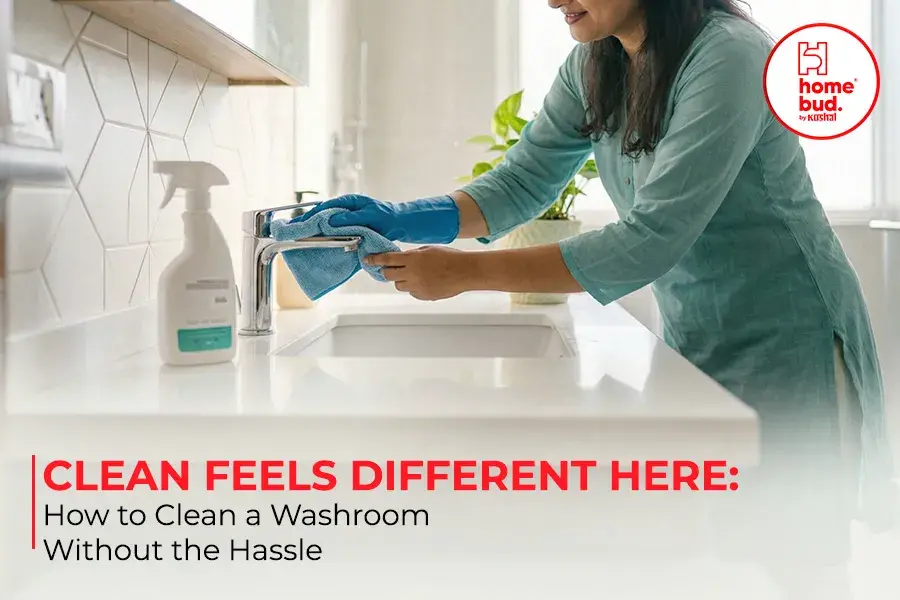
A clean washroom is not just about hygiene. It is about how your home feels the moment you walk in. That fresh smell, the dry floor, the spotless tiles — these small things add up to a home that feels genuinely well looked after.
But most people find washroom cleaning either overwhelming or frustrating because they do not have a clear routine and do not have the right tools. They end up using more effort than necessary and still walk out feeling like something was missed.
This guide breaks down exactly how to clean a washroom step by step — from clearing the space to drying the floor completely — in a way that works for real Indian homes, whether you are cleaning a compact bathroom, a family washroom, or a combined bathroom with a western commode.
Why Washrooms Get Dirty Faster Than Any Other Room
Understanding why your washroom gets messy so quickly helps you build a routine that keeps it under control rather than constantly catching up.
Washrooms deal with constant moisture from showers, bucket baths, and sink use. That moisture settles on floor tiles, grout lines, and wall surfaces, and if it is not dried regularly, it creates the perfect conditions for mold, mildew, and that persistent musty smell that is so difficult to get rid of once it develops. Soap scum builds up on tiles and fixtures faster than most people realise, and hard water deposits from taps and showerheads leave behind mineral stains that become harder to remove the longer they are left.
In Indian homes specifically, the bathroom floor is almost always completely wet after a bath or after washing, which means floor hygiene is one of the most important parts of washroom cleaning. A wet floor that is not dried properly stays damp for longer, increases the risk of slipping, and encourages bacterial growth in the grout between tiles.
The solution is not to clean harder. It is to clean smarter with the right sequence and the right tools.
What You Need Before You Start Cleaning a Washroom
Having your tools ready before you start makes the entire process faster and more effective. A professional cleaner never starts a job without their full toolkit in place. Here is what you need for a proper washroom clean.
A toilet cleaning brush with strong, dense bristles that can reach under the rim of the toilet bowl and into the inner curves where stains and bacterial residue build up fastest. The HomeBud Spark Clean Hockey Brush is built specifically for this — its double hockey head shape reaches the spots a standard round brush completely misses.
A floor wiper with a firm rubber blade and a long handle for drying the bathroom floor after cleaning. This is the tool most households skip and the reason their bathroom floor stays damp long after cleaning. A good rubber blade wiper pushed across a wet tile floor removes almost all the surface water in a few strokes, leaving the floor dry and safe to walk on immediately.
A scrubbing brush or scrub pad for tile surfaces and grout lines. Tiles need direct scrubbing pressure to remove soap scum and mineral deposits, and a cloth alone will not do the job on stubborn bathroom staining.
A cloth duster or soft broom for dry cleaning before water is introduced. Dry cleaning first prevents loose dust and debris from turning into muddy residue when the cleaning liquid is applied.
Your regular bathroom cleaning liquid or any standard floor and surface cleaner for Indian homes. Apply it to the toilet bowl, floor tiles, and sink area as directed.
How to Clean a Washroom Step by Step
Follow this sequence every time and your washroom cleaning will be faster, more thorough, and more satisfying than anything you have done before.
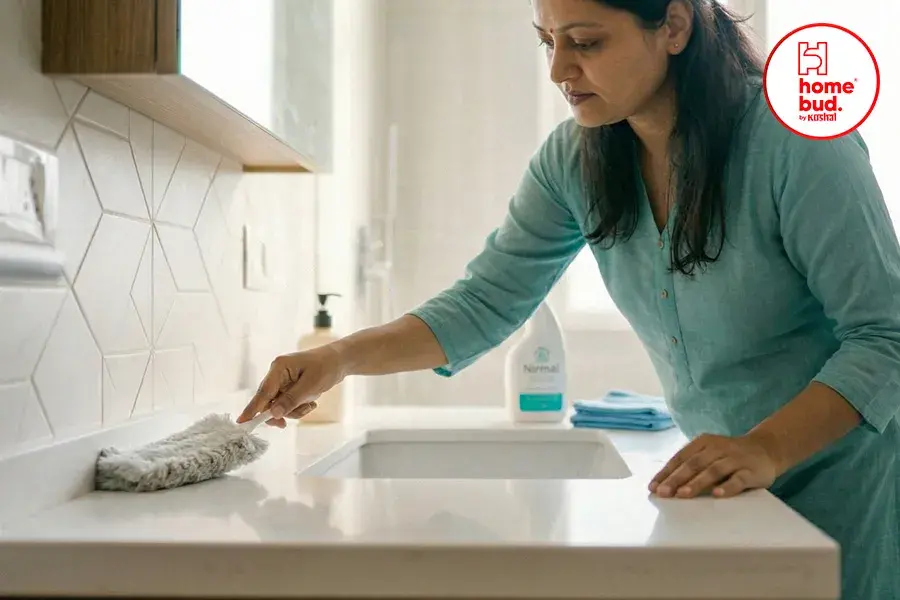
Step 1: Clear the Space First
![]()
Before a single drop of water or cleaning solution goes anywhere, clear the washroom of everything that does not belong there during cleaning. Move buckets, mugs, soap dishes, mats, loofahs, shampoo bottles, and any other items on the floor or low surfaces.
This step is not optional. Cleaning around obstacles leads to missed areas, uneven results, and the frustration of having to move things mid-clean with wet hands. A clear washroom gives you full access to every surface and lets you work in a smooth, uninterrupted sequence from one end to the other.
Step 2: Start With Dry Cleaning
The most common mistake people make when cleaning a washroom is going straight to water and cleaning liquid. Professional cleaners always dry clean first — and there is a very good reason for it.
When you apply water or cleaning solution to a dusty or debris-covered surface, the dust mixes with the liquid and creates a muddy film that is harder to remove than the original dust was. It also clogs drains faster and leaves a grimy residue on tiles and grout lines after the water dries.
Use your cloth duster or a soft broom to sweep down the walls, ceiling corners, and floor before any water touches the surface. Pay particular attention to the corners near the floor drain, behind the toilet base, and around the base of the tap fittings — these are the spots where dust and debris accumulate most and are most often skipped during quick cleans.
Step 3: Apply Cleaning Solution

Do not rush this step. Apply your bathroom cleaning liquid to the toilet bowl, tile surfaces, floor, and sink area and then step back and let it sit for three to five minutes before you start scrubbing.
This waiting time is what separates a surface clean from a genuine deep clean. The cleaning solution needs time to break down soap scum, mineral deposits, and bacterial residue. When you scrub immediately after applying, you are doing twice the physical work for half the result. When you wait, the solution does the heavy lifting and your scrubbing simply removes what has already been loosened.
Apply the toilet bowl cleaner under the rim specifically, not just into the water in the bowl. The under-rim area is where mold and limescale build up fastest and where most of the odour in a washroom originates.
Step 4 — Clean the Toilet Bowl the Right Way
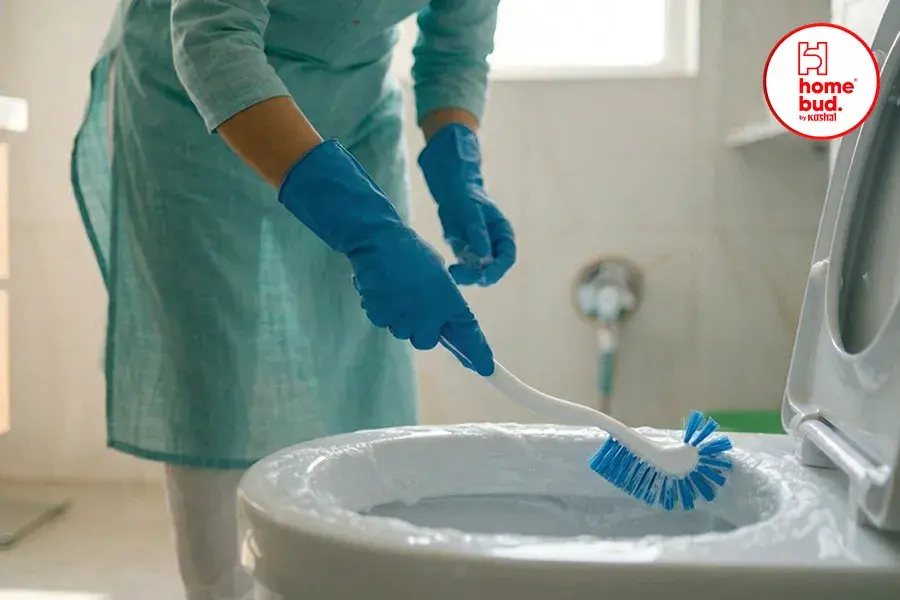
The toilet is the most important surface in any washroom from a hygiene perspective, and it is the one that needs the most deliberate attention during cleaning.
Use the HomeBud Spark Clean Hockey Brush to scrub the inside of the toilet bowl. The hockey-head design allows the brush to reach under the rim and around the inner curves of the bowl — areas that a standard round toilet brush cannot access without awkward repositioning. Scrub under the rim first, working the brush head all the way around the full circumference of the rim. Then scrub the bowl surface from the waterline down to the drain opening in firm, overlapping strokes.
For any visible staining or limescale buildup that does not lift with scrubbing, apply a small additional amount of cleaning solution directly to the stain, allow it to sit for a few minutes, and scrub again. The combination of soaking time and direct brush pressure removes even stubborn hard water stains from the bowl surface.
After scrubbing, flush the toilet while holding the brush in the flow of the flush water to rinse the bristles. Allow the brush to drip over the bowl for a few seconds before returning it to its holder.
Step 5 — Scrub the Floor Tiles and Grout Lines
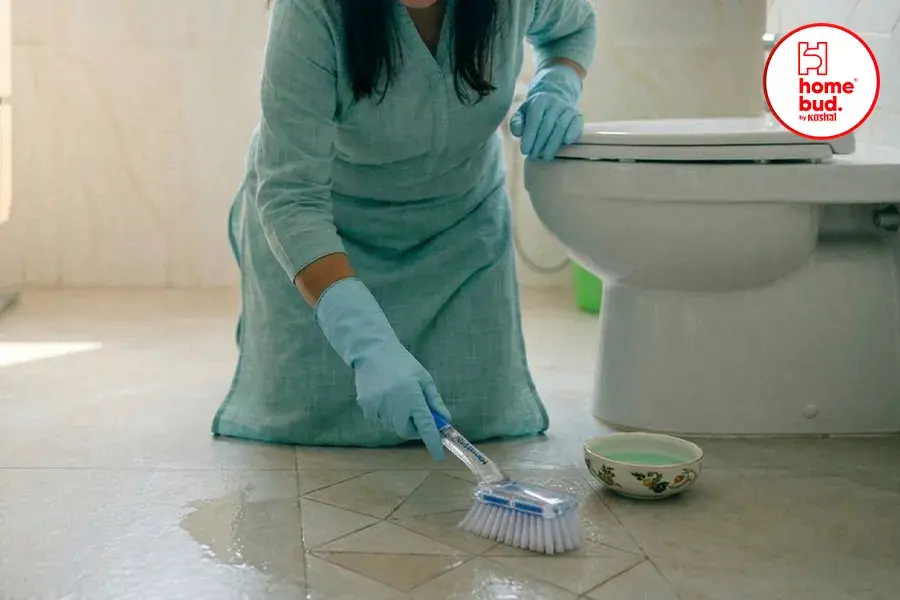
Bathroom floor tiles look clean from a distance but accumulate soap residue, hard water deposits, and biological buildup in the grout lines between them. Cleaning washroom floor tiles properly requires direct scrubbing pressure, not just rinsing.
Use your scrubbing brush or scrub pad on the tile surface, working in small circular motions across each section of the floor. Pay extra attention to the grout lines, the area directly around the floor drain, and the tile edges along the base of the walls — these are the zones where residue concentrates and where mold tends to develop first in a bathroom that stays damp.
After scrubbing, rinse the floor thoroughly with clean water. Make sure all cleaning solution residue is completely removed from the tile surface. Cleaning solution left on bathroom tiles after rinsing creates a film that makes the tiles look dull and can actually make the floor more slippery rather than cleaner.
Step 6 — Dry the Washroom Floor Completely
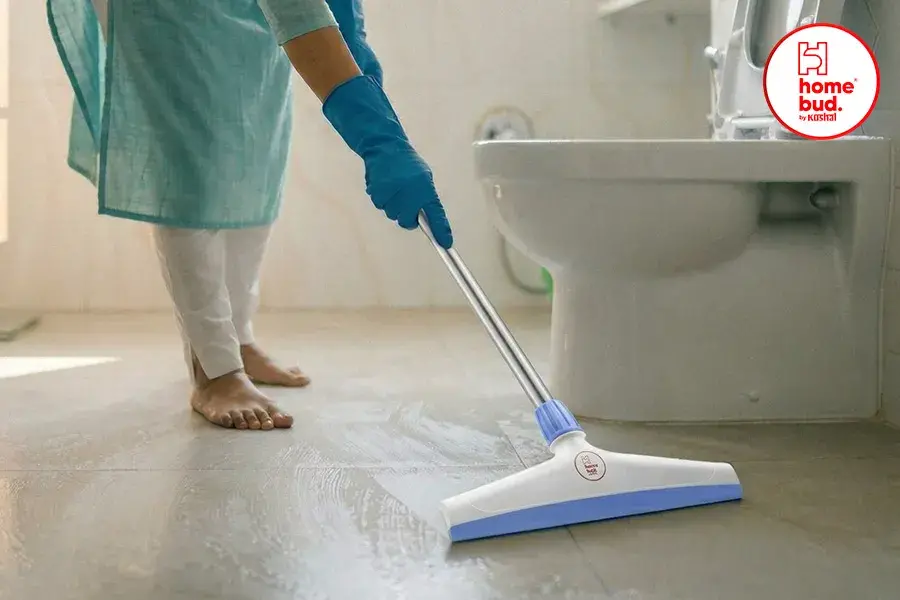
This is the step that most people skip and the one that makes the biggest visible and hygienic difference to how clean your washroom feels.
After rinsing, the bathroom floor will have significant standing water across its surface, particularly near the drain area and along the base of walls where the water collects. Do not leave this water to air dry on its own. Air drying leaves water marks on tiles, keeps the bathroom floor damp for far longer than necessary, and allows moisture to sit in the grout lines where mold develops.
Use a rubber blade floor wiper with a long handle to push all the standing water toward the floor drain in smooth, overlapping strokes. Start from the farthest wall and work toward the drain, using long firm strokes that push the water forward without splashing. A good rubber wiper clears almost all the surface water from a standard Indian bathroom floor in under a minute.
A dry bathroom floor after cleaning is safer to walk on, looks noticeably cleaner, and stays fresher for significantly longer between cleaning sessions. Explore the Homebud range of floor wipers and brooms at homebud.in/product-category/broom/ to find the right tool for your bathroom floor size.
Step 7 — Clean the Sink and Tap Fittings
The sink and tap area are often cleaned last and cleaned quickly, which means soap scum and mineral deposits around the tap base and plug area get left behind session after session until they become stubborn buildup.
After scrubbing the toilet and floor, apply a small amount of cleaning liquid to the sink basin, around the tap base, and on the tile surface directly behind the sink. Scrub with a cloth or small brush and rinse thoroughly. Wipe the tap fittings and the area around the soap dish with a damp cloth to remove any residue. Dry these surfaces with a clean cloth after rinsing to prevent water marks on the tap chrome.
Small Habits That Keep Your Washroom Clean Between Sessions
Knowing how to clean a washroom properly is one thing. Keeping it clean between full cleaning sessions is what makes the difference between a home that always feels fresh and one that only feels clean for a day or two after cleaning.
Dry the bathroom floor after every shower or bath using your floor wiper. This single habit eliminates the majority of mold risk, prevents water marks on tiles, and keeps the floor safe to walk on immediately after use. It takes less than a minute and the difference it makes to the long-term cleanliness of your bathroom tiles and grout is significant.
Rinse the toilet bowl with the brush after every use — a quick thirty-second scrub prevents staining from setting into the bowl surface and means your weekly deep clean requires far less effort.
Keep your cleaning tools clean and dry between uses. A wet toilet brush stored improperly, a wiper blade sitting in pooled water, or a scrubber left damp in a closed space all become hygiene problems of their own. Store tools in ventilated positions and rinse them after each use.
Ventilate the bathroom after every shower by opening the door or window for at least ten minutes. This reduces the humidity that causes mold to develop on grout, walls, and around fittings.
The Right Tools Make Washroom Cleaning Genuinely Easy
A professional cleaner does not work harder than necessary. They work with the right tools matched to the right surfaces, and the job gets done faster and with better results every time.
For toilet bowl cleaning, the HomeBud Spark Clean Hockey Brush delivers the under-rim reach and bristle density that a standard round brush cannot match. It is the right tool for a genuinely clean toilet bowl rather than one that only looks clean on the surface.
For bathroom floor drying after cleaning or after every shower, a rubber blade floor wiper with a long stainless steel handle is the single most effective tool you can own. It replaces towels, cloths, and the frustrating wait for air drying with a clean, quick wipe that leaves the floor dry in seconds.
Browse the complete Homebud cleaning tool range at homebud.in/product-category/broom/ and find the tools that match your washroom size, floor type, and daily cleaning routine.
How Often Should You Clean Your Washroom
Frequency matters as much as technique when it comes to bathroom hygiene. Here is the cleaning schedule that professional cleaners recommend for Indian home bathrooms.
Daily — dry the floor after every shower using a floor wiper, give the toilet bowl a quick scrub with the brush, and wipe down the sink surface with a damp cloth. This takes five minutes and prevents buildup from developing between deeper cleaning sessions.
Weekly — follow the full step by step routine above, including tile scrubbing, under-rim toilet cleaning, grout attention, and a thorough rinse and dry of all surfaces. A weekly deep clean done properly keeps the washroom genuinely hygienic and prevents the buildup of staining and mold.
Monthly — check grout lines for early signs of mold or discolouration and treat with a targeted cleaning solution. Descale tap fittings and the showerhead if applicable. Clean the drain cover and remove any debris from the drain channel.
FAQ — How to Clean a Washroom
How do I clean a washroom properly from start to finish?
Start by clearing all items from the space, then dry clean with a broom or cloth duster to remove loose dust before any water is applied. Apply bathroom cleaning liquid to the toilet bowl, tiles, floor, and sink and allow it to sit for three to five minutes. Scrub the toilet bowl with a hockey brush, focusing under the rim. Scrub floor tiles and grout lines with a scrubbing brush. Rinse all surfaces thoroughly. Then use a rubber blade floor wiper to push all standing water toward the drain and leave the floor completely dry. Clean the sink and tap area last and wipe dry.
How do I clean washroom floor tiles without leaving them looking dull?
Scrub tiles with a cleaning solution and a scrubbing brush in small circular motions, paying attention to grout lines and corners. Rinse thoroughly to remove all cleaning solution residue — leftover soap film is the most common cause of dull-looking tiles after cleaning. After rinsing, use a floor wiper to remove all standing water and allow the tiles to dry completely.
What is the best way to dry a bathroom floor after cleaning?
A rubber blade floor wiper with a long handle is the fastest and most effective tool for drying a bathroom floor. Push the water toward the floor drain in long, overlapping strokes starting from the far wall. A good wiper clears almost all the surface water from a standard Indian bathroom in under a minute, leaving the floor dry and safe to walk on immediately.
How do I clean under the toilet rim where stains build up?
A standard round toilet brush cannot reach under the rim effectively. A hockey-head toilet brush like the HomeBud Spark Clean Hockey Brush is specifically shaped to slide under the rim and scrub the underside directly. Apply toilet bowl cleaner under the rim and allow it to sit for a few minutes before scrubbing for best results.
How do I prevent mold from developing in my bathroom?
Mold develops where moisture stays. The most effective prevention is drying the bathroom floor after every use with a floor wiper, ventilating the bathroom for at least ten minutes after every shower, and cleaning grout lines regularly before mold has time to establish itself. A bathroom that dries quickly after every use is a bathroom that stays mold-free.
How often should I replace my bathroom cleaning tools?
A toilet brush should be replaced every six to twelve months under regular use. Replace it sooner if the bristles have spread out or if the brush has a persistent odour even after cleaning. A rubber wiper blade should be replaced when it no longer seals flat against the floor surface or when you can see visible cracks or thinning in the blade. A well-maintained rubber wiper lasts eight to twelve months under daily use.
A clean washroom does not happen by accident. It happens because you have a clear routine, the right tools for each surface, and the habit of doing a little every day rather than a lot once a month. Follow the steps above consistently, invest in tools that are built for the job, and your washroom will stay fresh, hygienic, and genuinely comfortable every single day.
Ready to upgrade your bathroom cleaning routine? Explore the full Homebud range of cleaning tools at homebud.in/product-category/broom/ and find everything you need in one place.